WordPressに関連記事をプラグインなしで作る方法
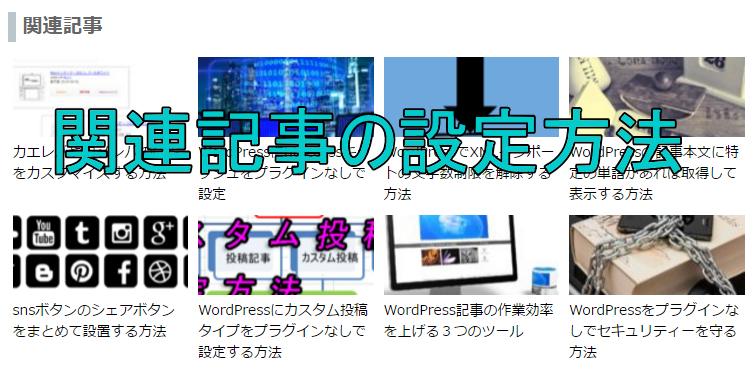
WordPressに関連記事があると、一つのページを読み終えた人が他のぺージにも訪れる確率が上がります。サイトの滞在時間も増えて、複数のページを読んで貰えるので設置するのがお勧めです。
通常は関連記事は、個別ページの最下層に設置します。
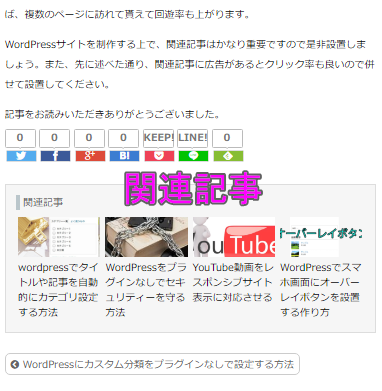
記事を読み終えた人が関連記事を見て、次の記事に興味を持ち移動して貰うためです。
関連記事はWordPressプラグインを使えば簡単に実装できます。しかし、WordPressに関連記事を出力するPHPがあるので、何でもプラグインに頼るのは良くないと思います。
自分で設定する方が柔軟にカスタマイズできるので、作成方法を覚えておくと良いと思います。
関連記事は、記事が所属するカテゴリーやタグからランダムに他の記事を表示させます。
例えば、サイトのカテゴリーにWordPressがあるとします。そのカテゴリー(WordPress)に所属する記事が、関連記事部分に表示されます。
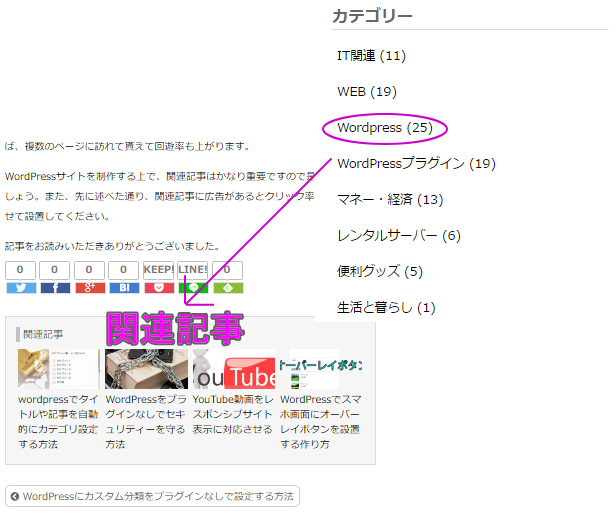
このページでは、WordPressプラグインなしで関連記事を表示させる方法をご紹介します。
関連記事の設定方法
関連記事の設定はサンプルコードを使用して装備すれば簡単です。コピー&ペーストでOKです。詳しいコードの解説もしますので覚えてください。
カテゴリー分けによる関連記事の表示「サムネイル画像付き」
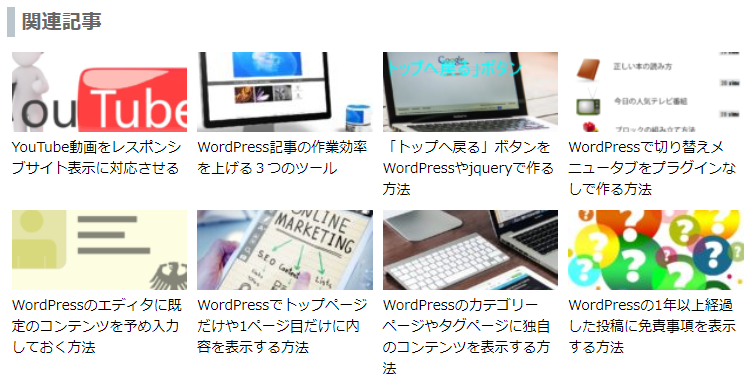
記事が所属するカテゴリーに関する関連記事が表示されます。サムネイル画像が付いていてわかりやすいタイプです。
以下のコードを投稿記事ページのテンプレート部分に記述します。関連記事を表示したい部分に記述してください。通常であれば、投稿記事ページは、index.phpやsingle.phpを使用します。
	<?php if( has_category() ) {
		$cats = get_the_category();
		$catkwds = array();
		foreach($cats as $cat) {
			$catkwds[] = $cat->term_id;
		}
	} ?>
	<?php
	$myposts = get_posts( array(
		'post_type' => 'post',
		'posts_per_page' => '8',
		'post__not_in' => array( $post->ID ),
		'category__in' => $catkwds,
		'orderby' => 'rand'
	) );
	if( $myposts ): ?>
	<aside class="related">
	<h2>関連記事</h2>
	<ul>

		<?php foreach($myposts as $post):
		setup_postdata($post); ?>
		<li><a href="<?php the_permalink(); ?>">

		<?php if( has_post_thumbnail() ): ?>
		<?php $postthumb = wp_get_attachment_image_src( get_post_thumbnail_id(), 'thumbnail'); ?>
		<div class="thumb" style="background-image: url(<?php echo $postthumb[0]; ?>)"></div>

		<?php elseif( preg_match( '/wp-image-(\d+)/s', $post->post_content, $thumbid ) ): ?>
		<?php $postthumb = wp_get_attachment_image_src( $thumbid[1], $size ); ?>
		<div class="thumb" style="background-image: url(<?php echo $postthumb[0]; ?>)"></div>

		<?php else: ?>
		<div class="thumb" style="background-image: url(<?php echo get_template_directory_uri(); ?>/noimage.png)"></div>
		<?php endif; ?>

		<div class="text">
		<?php the_title(); ?>
		</div>
		</a></li>
		<?php endforeach; ?>

	</ul>
	</aside>
	<?php wp_reset_postdata();
	endif; ?>
それぞれのコードの意味を解説します。
has_category()
has_category()でカテゴリーの関連記事がある場合にのみ表示されます。関連記事が無い場合は何も表示されません。
get_the_category()
get_the_category()で記事が所属するカテゴリーのみからデータを抽出します。記事が複数のカテゴリーに所属している場合は、全てのカテゴリーから抽出されます。
post_type
投稿記事ページであれば「post」、固定ページであれば「page」を記述します。
posts_per_page
表示する記事の数を記述します。
post__not_in
表示中の記事を関連記事から除外します。
category__in
get_the_category()で抽出したカテゴリーに属する記事のみを出力の対象とします。
orderby
「rand」でランダムにカテゴリー内から関連記事を表示します。
「date」で日付順でカテゴリー内から関連記事を表示します。
「modified」で更新日順でカテゴリー内から関連記事を表示します。
has_post_thumbnail()
サムネイル画像を表示するコードです。 記事に登録されているアイキャッチ画像が表示されます。もし、無い場合は記事内の1番目にある画像が表示されます。それもない場合は、「NoImege」画像が表示されます。
「NoImege」画像は予め使用しているテーマのディレクトリ内にアップロードしておきます。次の画像はサンプルです。保存して使用してください。

カテゴリー分けによる関連記事の一覧表示
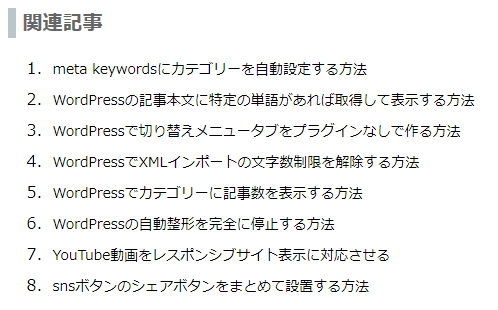
記事が所属するカテゴリーに関する関連記事の一覧表示をします。
	<?php if( has_category() ) {
		$cats = get_the_category();
		$catkwds = array();
		foreach($cats as $cat) {
			$catkwds[] = $cat->term_id;
		}
	} ?>
	<?php
	$myposts = get_posts( array(
		'post_type' => 'post',
		'posts_per_page' => '8',
		'post__not_in' => array( $post->ID ),
		'category__in' => $catkwds,
		'orderby' => 'rand'
	) );
	if( $myposts ): ?>
	<aside class="related">
	<h2>関連記事</h2>
	<ol>

		<?php foreach($myposts as $post):
		setup_postdata($post); ?>
		<li><a href="<?php the_permalink(); ?>">

		<div class="text">
		<?php the_title(); ?>
		</div>
		</a></li>
		<?php endforeach; ?>

	</ol>
	</aside>
	<?php wp_reset_postdata();
	endif; ?>
タグ分けによる関連記事の表示「サムネイル画像付き」
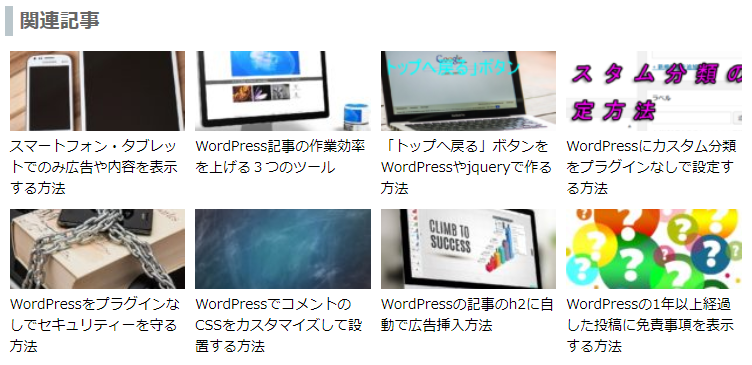
記事が所属するタグに関する関連記事が表示されます。サムネイル画像が付いているタイプです。記事が複数のタグに所属している場合でも、問題ありません。複数のタグからランダムに関連記事が表示されます。
	<?php if( has_tag() ) {
		$cats = get_the_tag();
		$catkwds = array();
		foreach($cats as $cat) {
			$catkwds[] = $cat->term_id;
		}
	} ?>
	<?php
	$myposts = get_posts( array(
		'post_type' => 'post',
		'posts_per_page' => '8',
		'post__not_in' => array( $post->ID ),
		'tag__in' => $catkwds,
		'orderby' => 'rand'
	) );
	if( $myposts ): ?>
	<aside class="related">
	<h2>関連記事</h2>
	<ul>

		<?php foreach($myposts as $post):
		setup_postdata($post); ?>
		<li><a href="<?php the_permalink(); ?>">

		<?php if( has_post_thumbnail() ): ?>
		<?php $postthumb = wp_get_attachment_image_src( get_post_thumbnail_id(), 'thumbnail'); ?>
		<div class="thumb" style="background-image: url(<?php echo $postthumb[0]; ?>)"></div>

		<?php elseif( preg_match( '/wp-image-(\d+)/s', $post->post_content, $thumbid ) ): ?>
		<?php $postthumb = wp_get_attachment_image_src( $thumbid[1], $size ); ?>
		<div class="thumb" style="background-image: url(<?php echo $postthumb[0]; ?>)"></div>

		<?php else: ?>
		<div class="thumb" style="background-image: url(<?php echo get_template_directory_uri(); ?>/noimage.png)"></div>
		<?php endif; ?>

		<div class="text">
		<?php the_title(); ?>
		</div>
		</a></li>
		<?php endforeach; ?>

	</ul>
	</aside>
	<?php wp_reset_postdata();
	endif; ?>
タグ分けによる関連記事の一覧表示

サムネイル画像なしで記事が所属するタグに関する関連記の一覧表示をします。
	<?php if( has_tag() ) {
		$cats = get_the_tag();
		$catkwds = array();
		foreach($cats as $cat) {
			$catkwds[] = $cat->term_id;
		}
	} ?>
	<?php
	$myposts = get_posts( array(
		'post_type' => 'post',
		'posts_per_page' => '8',
		'post__not_in' => array( $post->ID ),
		'tag__in' => $catkwds,
		'orderby' => 'rand'
	) );
	if( $myposts ): ?>
	<aside class="related">
	<h2>関連記事</h2>
	<ol>

		<?php foreach($myposts as $post):
		setup_postdata($post); ?>
		<li><a href="<?php the_permalink(); ?>">

		<div class="text">
		<?php the_title(); ?>
		</div>
		</a></li>
		<?php endforeach; ?>

	</ol>
	</aside>
	<?php wp_reset_postdata();
	endif; ?>
CSSのサンプル
関連記事のCSSサンプルを記載します。参考にしてください。
CSSのflex(フレキシブルボックス)を使ってデザイン指定しています。通常は、floatを使って横並びに設定しますが、2段組になるの高さの幅が統一できません。
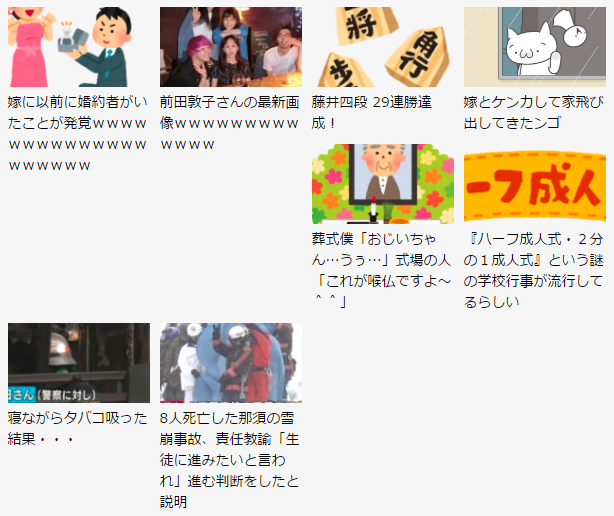
flexを使用すれば簡単にfloatのようなボックスが組めて、高さの統一やメンテナンス性も良いのでお勧めです。
今後のWEB業界としてはfloatが使われなくなり、flexに変わっていきます。是非、機会があれば勉強してみてください。
以下のCSSコードをstyle.cssに記述します。
/* 関連記事メニュー */
.related {
	margin: 40px 0 0;
}
.related h2 {
	padding: 0 0 0 7px;
	border-left: solid 8px #bac6cb;
	border-bottom: none;
	font-size: 20px;
}
.related h2:before {
	content: none;
}
.related ul {
	list-style: none;
	margin: 0px;
	padding: 0px;
}
.related li a {
    padding: 5px 0;
	border: none;
	color: #000000;
	flex: 1;
	font-size: 14px;
	text-decoration: none;
	display: block;
}
.related li a:hover {
	background-color: #eeeeee;
}
 @media (max-width: 599px) {
.related {
	padding: 10px 0;
}
.related li .thumb {
	width: 80px;
	height: 50px;
    float: left;
}
.related li .text {
	margin-left: 95px;
}
.related li a:after {
	content: "";
	display: block;
	clear: both;
}
}
 @media (min-width: 600px) {
.related ul {
	display: flex;
	flex-wrap:wrap;
}
.related li {
	display: flex;
	flex: 0 0 25%;
	padding: 0 5px;
	-moz-box-sizing: border-box;
	-webkit-box-sizing: border-box;
	box-sizing: border-box;
}
.related li .thumb {
	width: 100%;
	height: 80px;
	margin-bottom: 5px;
}
.related li .text {
	margin-left: 0;
}
}
まとめ
今回はWordPressプラグインなしで関連記事を表示する方法を紹介しました。以外と簡単にできるため、プラグインは不要だと思いました。
関連記事があるのとないのとではサイト滞在時間も大違いです。普通なら一つの記事を読み終えれば他のサイトに移動することが多いです。しかし、関連記事があれば、複数のページに訪れて貰えて回遊率も上がります。
WordPressサイトを制作する上で、関連記事はかなり重要ですので是非設置しましょう。
記事をお読みいただきありがとうございました。